Sometimes when you buy a straight skirt or form fitting dress, there may be a very deep slit that shows far too much skin. It can limit your movements, especially if you need to bend. Fortunately, there is a simple solution - add a fabric panel! It's basically a rectangle of fabric inserted directly on the slit, giving you tons of freedom to move as you wish.
I took this cute black velvet dress and added a panel of black lace I cut from the back of a lace jacket. It's great to upcycle something and put it to good use.
Here is what the dress looks like before. The slit goes up too far revealing lots of leg.
When she walks, the slit opens up even more. My goal was to hide all of this with a panel.
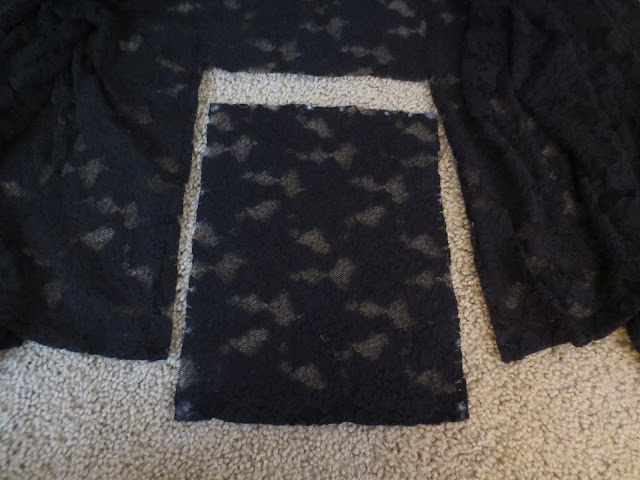
Here is a jacket she gave me to use for material. It was a stretchy black lace jacket which was a perfect donor to use on this velvet jersey dress.
I measured 10" lengthwise past the slit. The opening was approximately 6.5 inches wide as it's worn.
I decided to make an 8" x 10" rectangle out of the lace fabric. I needed to get the most material for a rectangle, so I used the back end of the jacket.
I cut out the rectangle piece.
I took the long part of the rectangle and pinned it to one side of the slit. I left a small opening towards the top of the slit because that's where I will pleat the material. I also kept the lace flat against the slit.
I did the same to the other side of the slit. I left 1/2" seam allowance on the lace. I pinned the lace 1/2" past the slit edge.
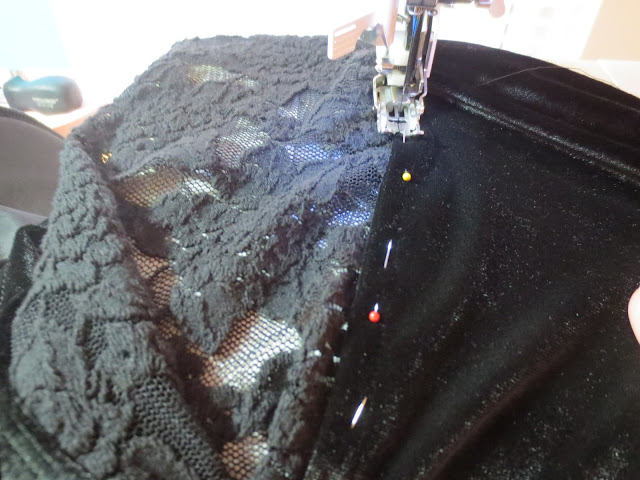
After pinning, I flipped it over to the right side to reverse the pins. My goal was to top stitch the slit onto the lace, so it lays flat. I stitched as close as I could to the edge.
I stopped stitching about an inch from the top of the slit and backstitched.
I did the same on the other side of the slit.
I turned the dress inside out and laid the skirt and slit flat. I folded the lace piece as shown.
Here is the top of the slit. There's only a little bit remaining to sew.
I pinned the lace to the top of the slit.
Here is the right side. I reversed the pin and pinned it on the right side as shown. I want to top stitch the velvet to the lace.
I top stitched a short line of stitches across.
This may not be necessary, but I wanted to cut off the excess lace now that it's top stitched. Here I stitched across the edge before cutting. You could probably just cut, since it's jersey, it won't unravel.
Now that my excess piece is sewn, I'm going to trim the excess near the stitching.
Excess trimmed!
Now it was time to trim some excess lace off behind the slit.
Now that I have the top piece trimmed, I want to fold in the edges.
I folded over one edge...
Then I folded the right edge to overlap the left.
I hand stitched the overlapped edges together.
I did this so the top edge would lay flat against the wearer. That was final step, the panel is now complete!
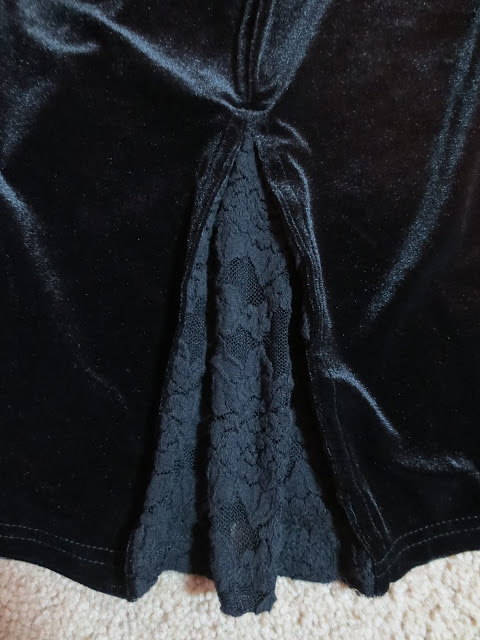
Here is the right side.
Here is the right side fanned out a little more.
I was not able to get a picture of the dress being worn, but
she was so thrilled with it. I knew this
panel was a success and I think it was a great idea of my client to have me use
her jacket for donor material. I think
the mix of velvet and lace together was a good choice and interesting! I hope you enjoyed this tutorial, have a great day!
Happy Sewing!...Diana


Post a Comment