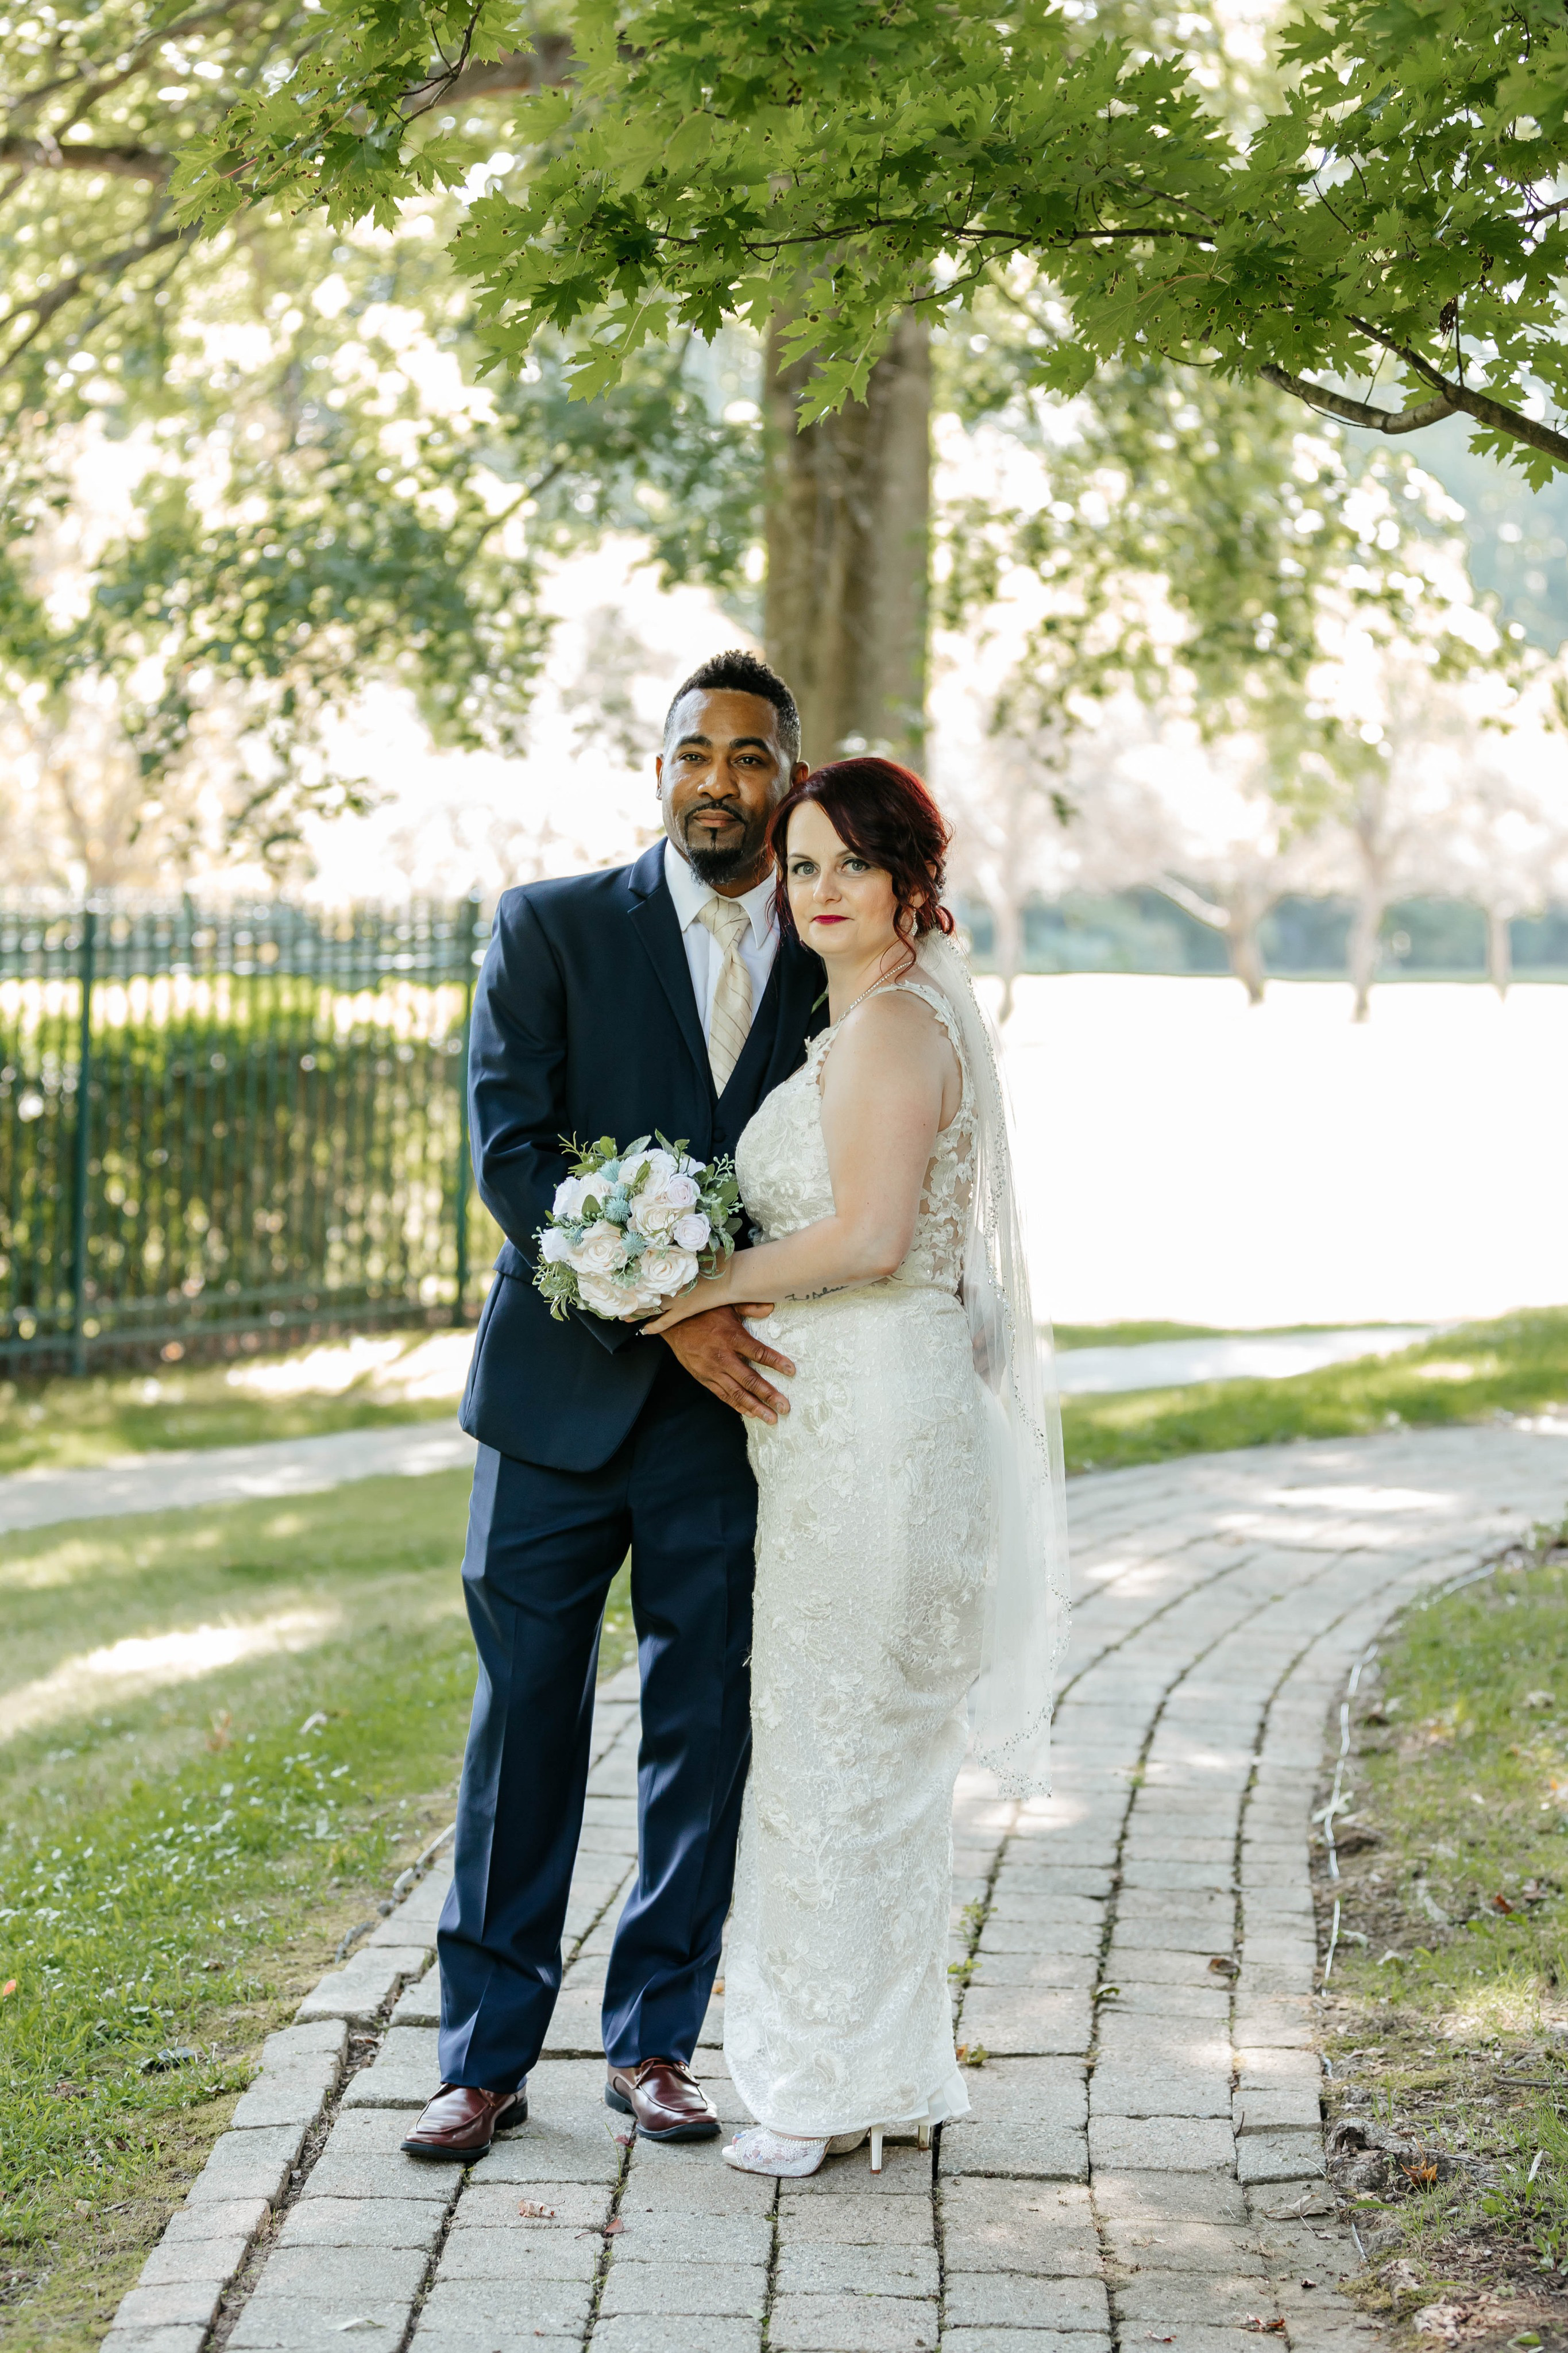
Congratulations to Ivona and Keith on their wedding day! I’ve had the pleasure of altering another gown from Lux
Redux for the lovely bride Ivona.
Her gown needed the straps shortened, hemmed, bustled
and the button loops repaired which I covered in my part 1 series tutorial. This is
a mermaid shaped gown with a fishtail train.
It’s completely covered with gorgeous lace applique.
To hem this gown, the applique had to be removed
and sewn back on in a way to compliment the pattern of the applique design. I actually found it was not complicated because the applique was a mix of flowers and leaves scattered on a mesh lace fabric.
In this tutorial I will cover from start to finish on how to
hem this style gown! I will go over marking,
measuring, hemming and removing the applique as well as sewing it back on.
Here is Ivona trying on the gown at Luxe Redux. It definitely needs hemmed.
I must explain first before diving in the rest of this tutorial. I lost my first group of pics of this tutorial while I was sorting and organizing my pics. It's unbelievable how the delete feature is near the rename! I clicked on the wrong one and could not find and retrieve them! This simple drawing above is all I had to do to the gown hem.
The pics that are missing was the first work I did which turned out to be a re-do. That was perfectly fine because it was not an unfixable mistake. The pink mark was where I stopped past the side seam, and I realized it was too deep an angle. The green mark is my correction. All I did was continue the hem further past the side seam to blend the angle into the train better. It made a big difference.
Here is my hem partially done in front. I needed to straighten the angle a bit more as shown in my diagram. Important note: You must remove any applique pieces that are
in the new hem area. All you have to do
is remove them with a single edge blade, they come right off. As you can see, I left a few pieces dangling
free because I may be able to reattach them as they are. If not, I'll just remove them to make the hem look good. You'll see me removing these a little further into the tutorial.
Here's a close up of the adjustment.
Another close up going past the side seam. I pinned it up out of the way while she was wearing it.
Here is the end near the train. I pinned it at an angle. My goal is to taper down to the original hem.
Here, I am making sure the ends of each side are equal past the train. I have the gown on the floor on its side. This is a good way to make the hem even.
These safety pins mark where the new hem will be. They serve an important purpose in marking.
Here, I replaced my straight pins (in the pic before this) with safety pins. I only do this so I don't lose my hem placement. Sometimes straight pins fall out easily.
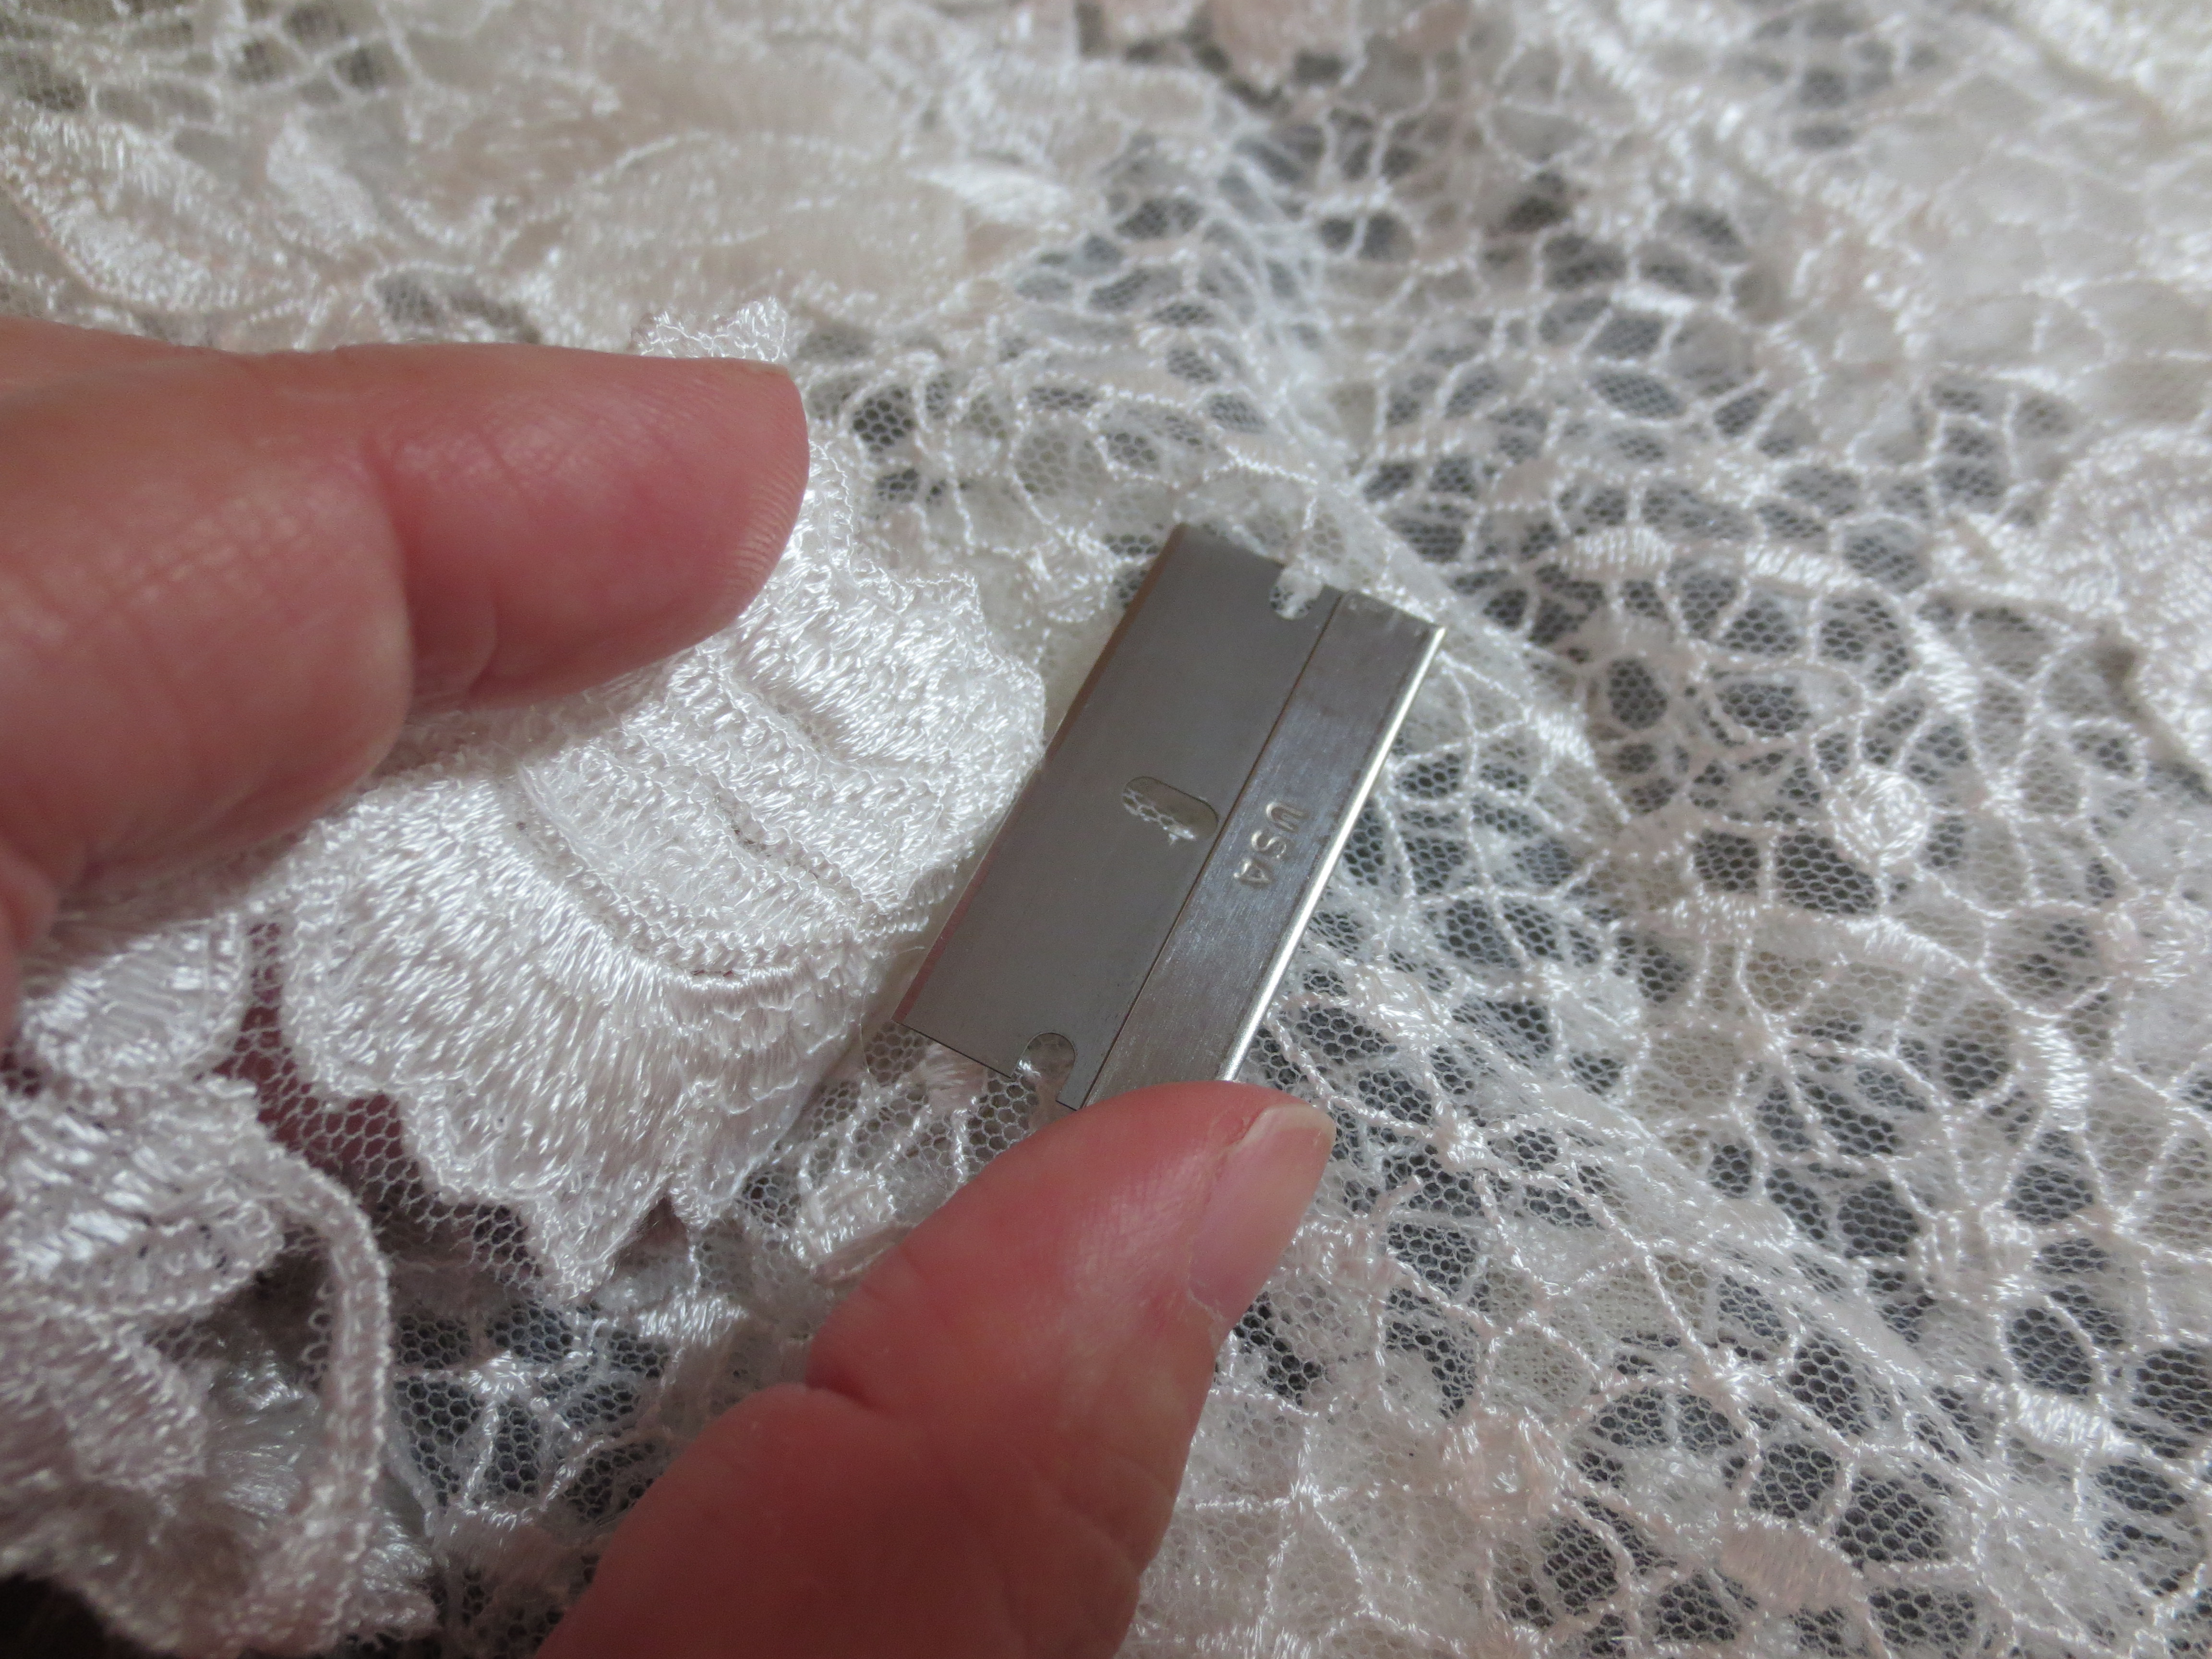
Now it's time to remove the applique pieces. I like to use a single blade for this, you could also use a seam ripper. I take the blade and slide it gently underneath a piece and start to remove the first stitch. Once that breaks, the rest of it easily comes off. I just grab the piece and keep sliding the blade underneath until the piece comes off. Some of the applique on this dress was large and attached to some I didn't want to remove. What I did was cut the piece off in an area that would make sense with the design. For example, I cut around a leaf or a flower, rather than cutting through it. Work with the design and it'll make sense in the end.
Removing a flower. This is not the correct position of my hand using a blade. I was holding the camera in my right, so I couldn't use both hands. Of course, I use my left to hold the piece and my right to slide the blade underneath to remove the pieces.
Now that I have the pieces removed, I need to undo the stitches on the original hem. There is hair braid underneath that I want to reuse for the new hem.
I used my seam ripper for this one.
Here is the hair braid exposed. It's very narrow.
To remove the rest of the hair braid, I slid my blade underneath to break the stitches.
I removed the hair braid to the safety pin at the train where it stops.
I cut the hair braid because the length is going to change here. I plan to reattach the braid.
I reattached the braid directly on the edge of the fold. This will be stitched on, I'm going to cut the excess, fold once more, then stitch.
The safety pin is where the new hem will be. This hair braid will be stitched once, then I cut that folded excess fabric. I then fold up one last time to where the pin is, and stitch. Once you do the final stitch, the pin will need to be removed.
Initial stitch to get the hair braid on. See my safety pin? That's where the new hem will be. I kept it there so you can see. I did remove them so I wouldn't sew over them.
Hair braid is now attached.
Now that the hair braid is attached, I need to trim the excess fabric starting at the end here.
Continuing to trim...I have a long way to go!
Now that the excess fabric is trimmed, I'm going to fold the hem with the hair braid once more and stitch.
Final stitch for the hem.
Hem is finished! I gave the new hem a press with my iron. Now on to the applique.
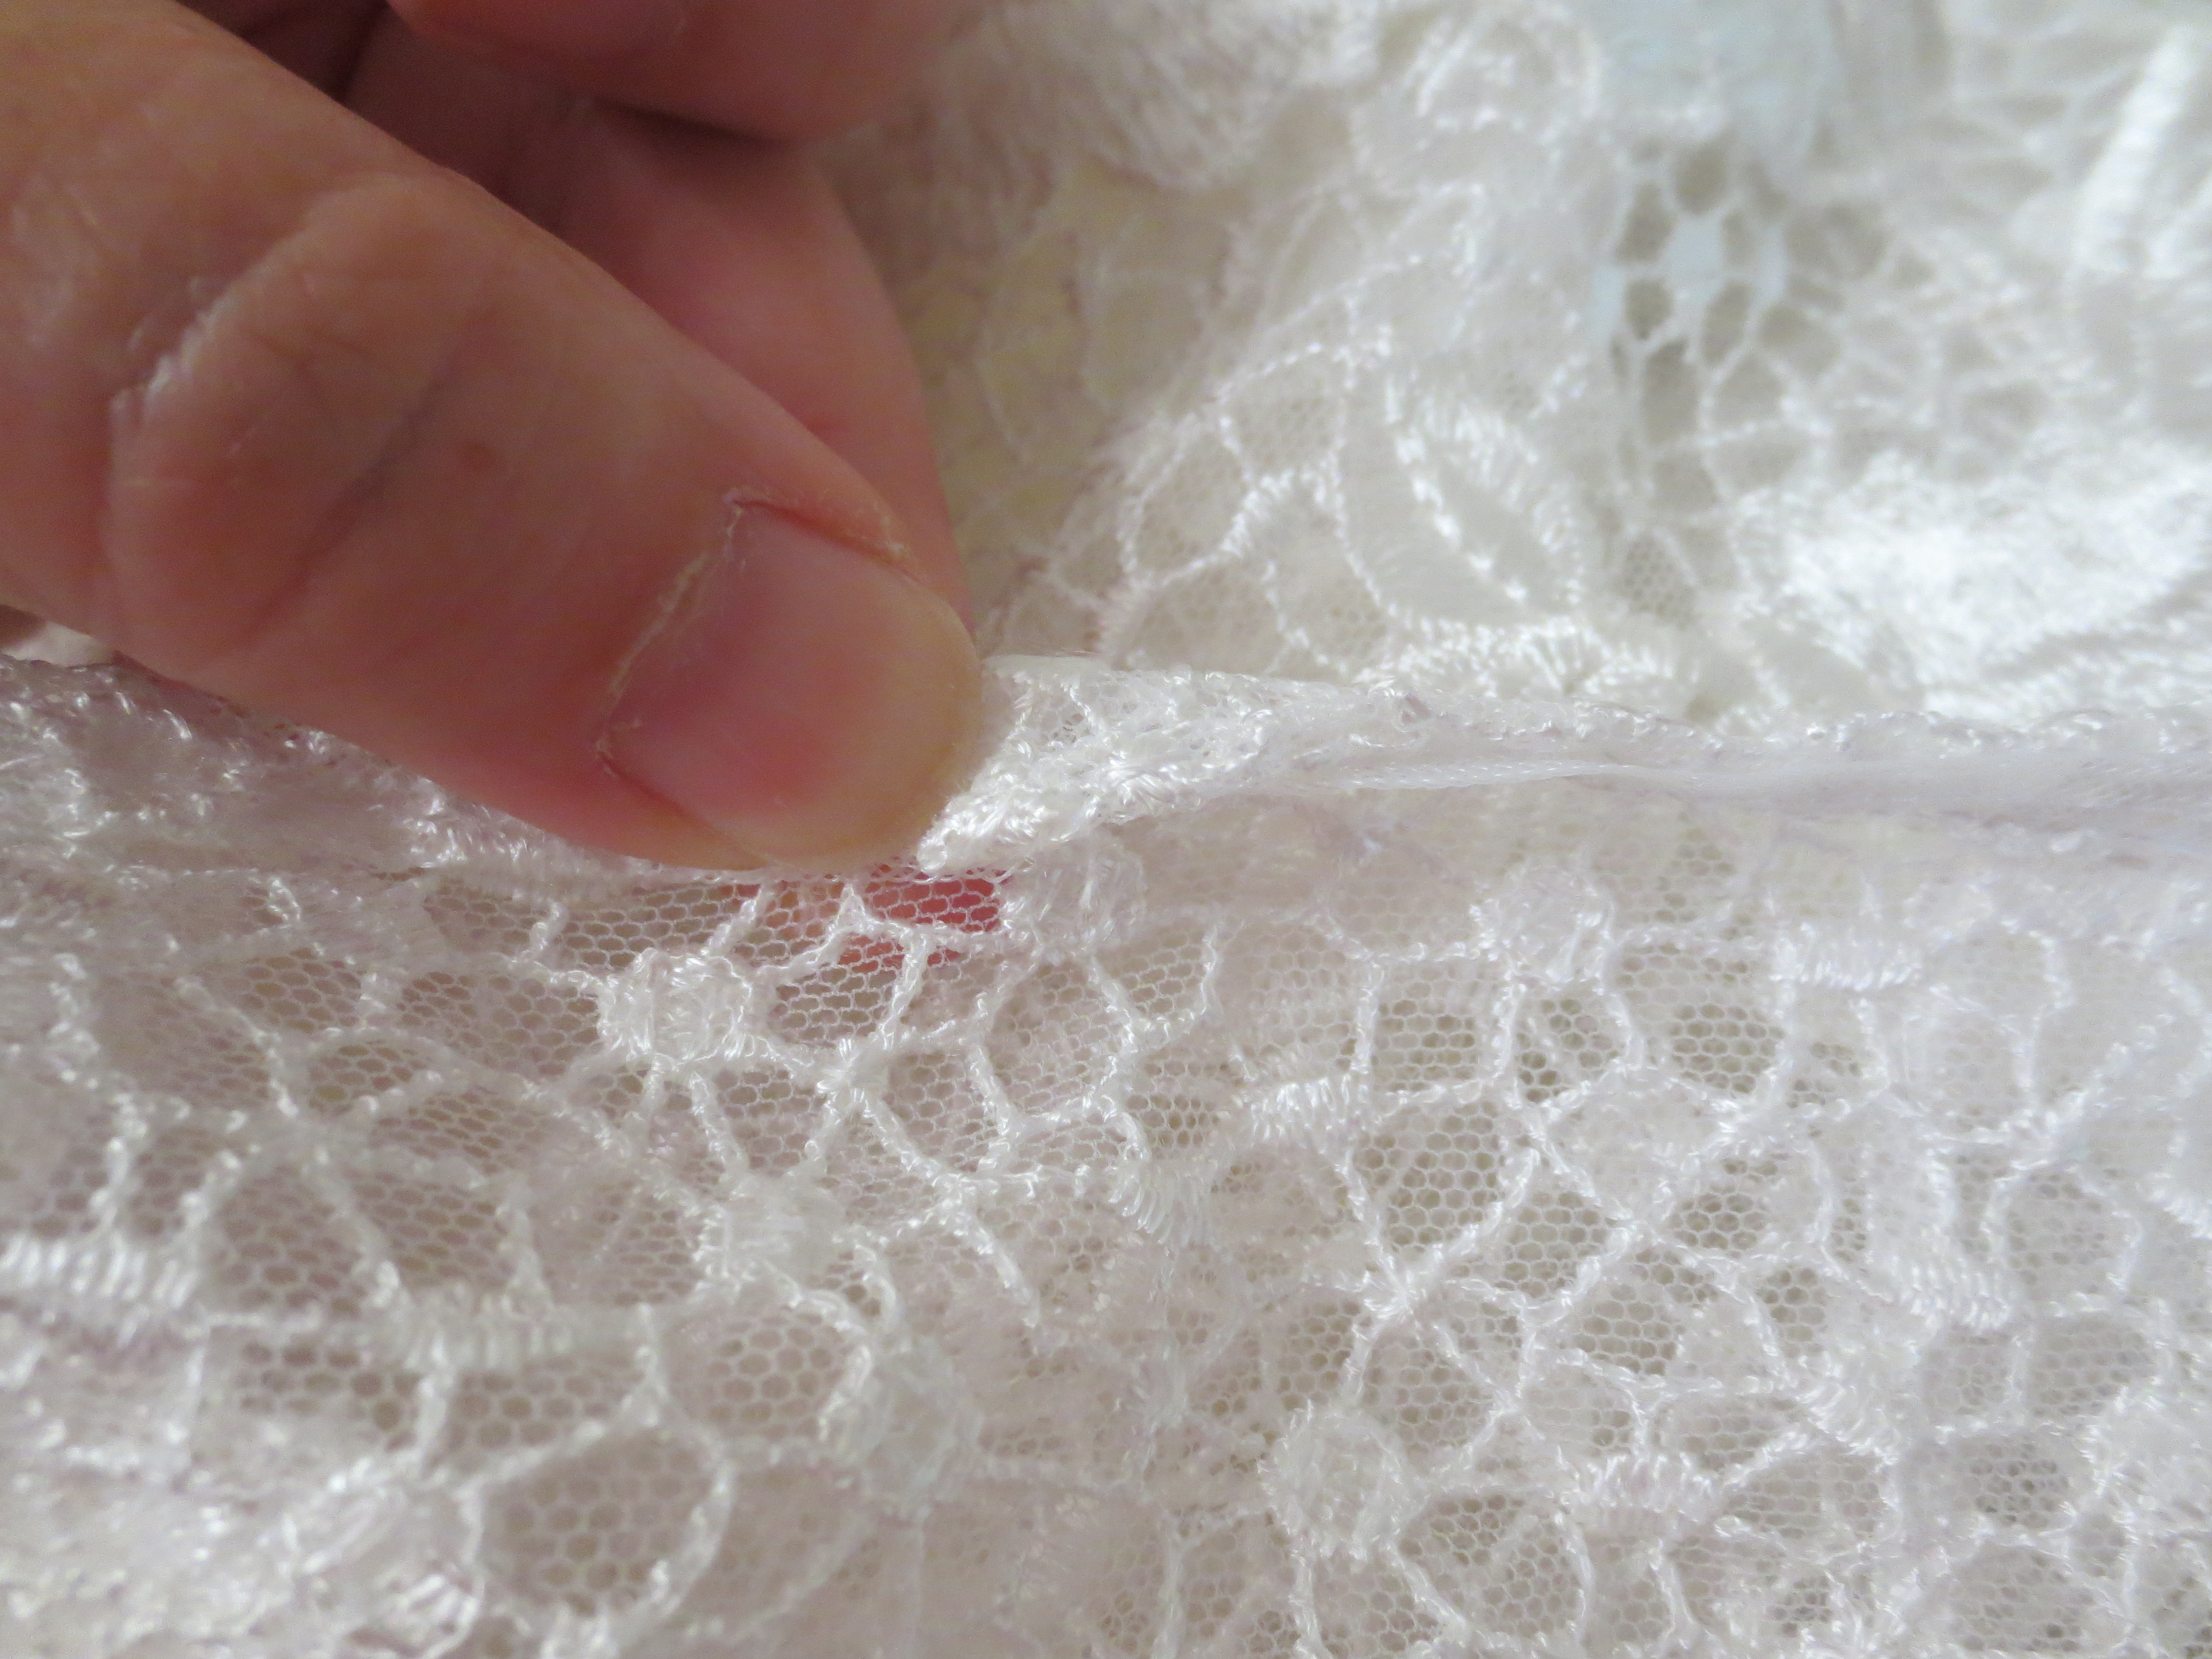
Here are the applique pieces I left hanging off the edge of the hem.
I cut off the pieces as shown. I cut around any of the shapes, flowers, leaves, etc. If the design goes into another, I cut off a stem or cut around anything that would make sense. It won't unravel, it can be sewn back on.
Now it's time to sew on the pieces. I arranged a piece here and placed some pins to hold it in place.
I attached my darning foot and lowered my feed dogs for free motion stitching.
I think this is the best thread to use for this - transparent thread.
I placed the applique edge under the needle and started free motion stitching all around the piece. I finished attaching every piece in a manner that goes with the whole design.
The final step of hemming was the 2 layers of chiffon lining underneath. I previously marked how much she needed taking up during the fitting. This is how much I had to take up.
I hem chiffon the same every time. I fold it, stitch, cut excess, then fold once more and stitch. Here I am doing the first stitch with the chiffon folded. The safety pin is where the new hem will be. Notice is 1/4" away from the edge.
After stitching, I trim the excess fabric near the edge of the stitching.
Fold over one last time, stitch and press.
The following are more stunning photos Ivona sent me. In the next tutorial, part 3 series, I will
cover how to install the French bustle on this gown!
That completes part 2 of this tutorial series! The hem is now complete and in my next and last post will be the bustle. See you next time and thanks for stopping by!
😉💖🧵🧷


Post a Comment