

Elastic loop trim fastens all those pretty bridal buttons and often gets stretched out. Those itty-bitty loops can take much strain while fastening and unfastening buttons. This is a very simple tutorial on how to fix this problem. There are two ways you can do this. The entire button loop trim can be replaced, or you can just replace the elastic loops one at a time. Since I only had 11 loops to fix, the bride's choice was to purchase matching elastic cord for me to use and replace the worn ones with new.
Here is the bride Ivona in my cover photo, showing off all those beautiful white buttons!
It was very tricky choosing the exact color match online, but we came very close. Good news is once the button is fastened, the majority of the loop is concealed! We didn't have to worry too much about the nude color being off a bit. She was completely fine with the color. The most important thing was to have stretchy and sturdy loops again.

Here is one of the stretched-out loops. Once pulled, the elastic wants to break as you can see in some spots.

Here is the nude elastic cord purchased from Etsy at Rope Design.

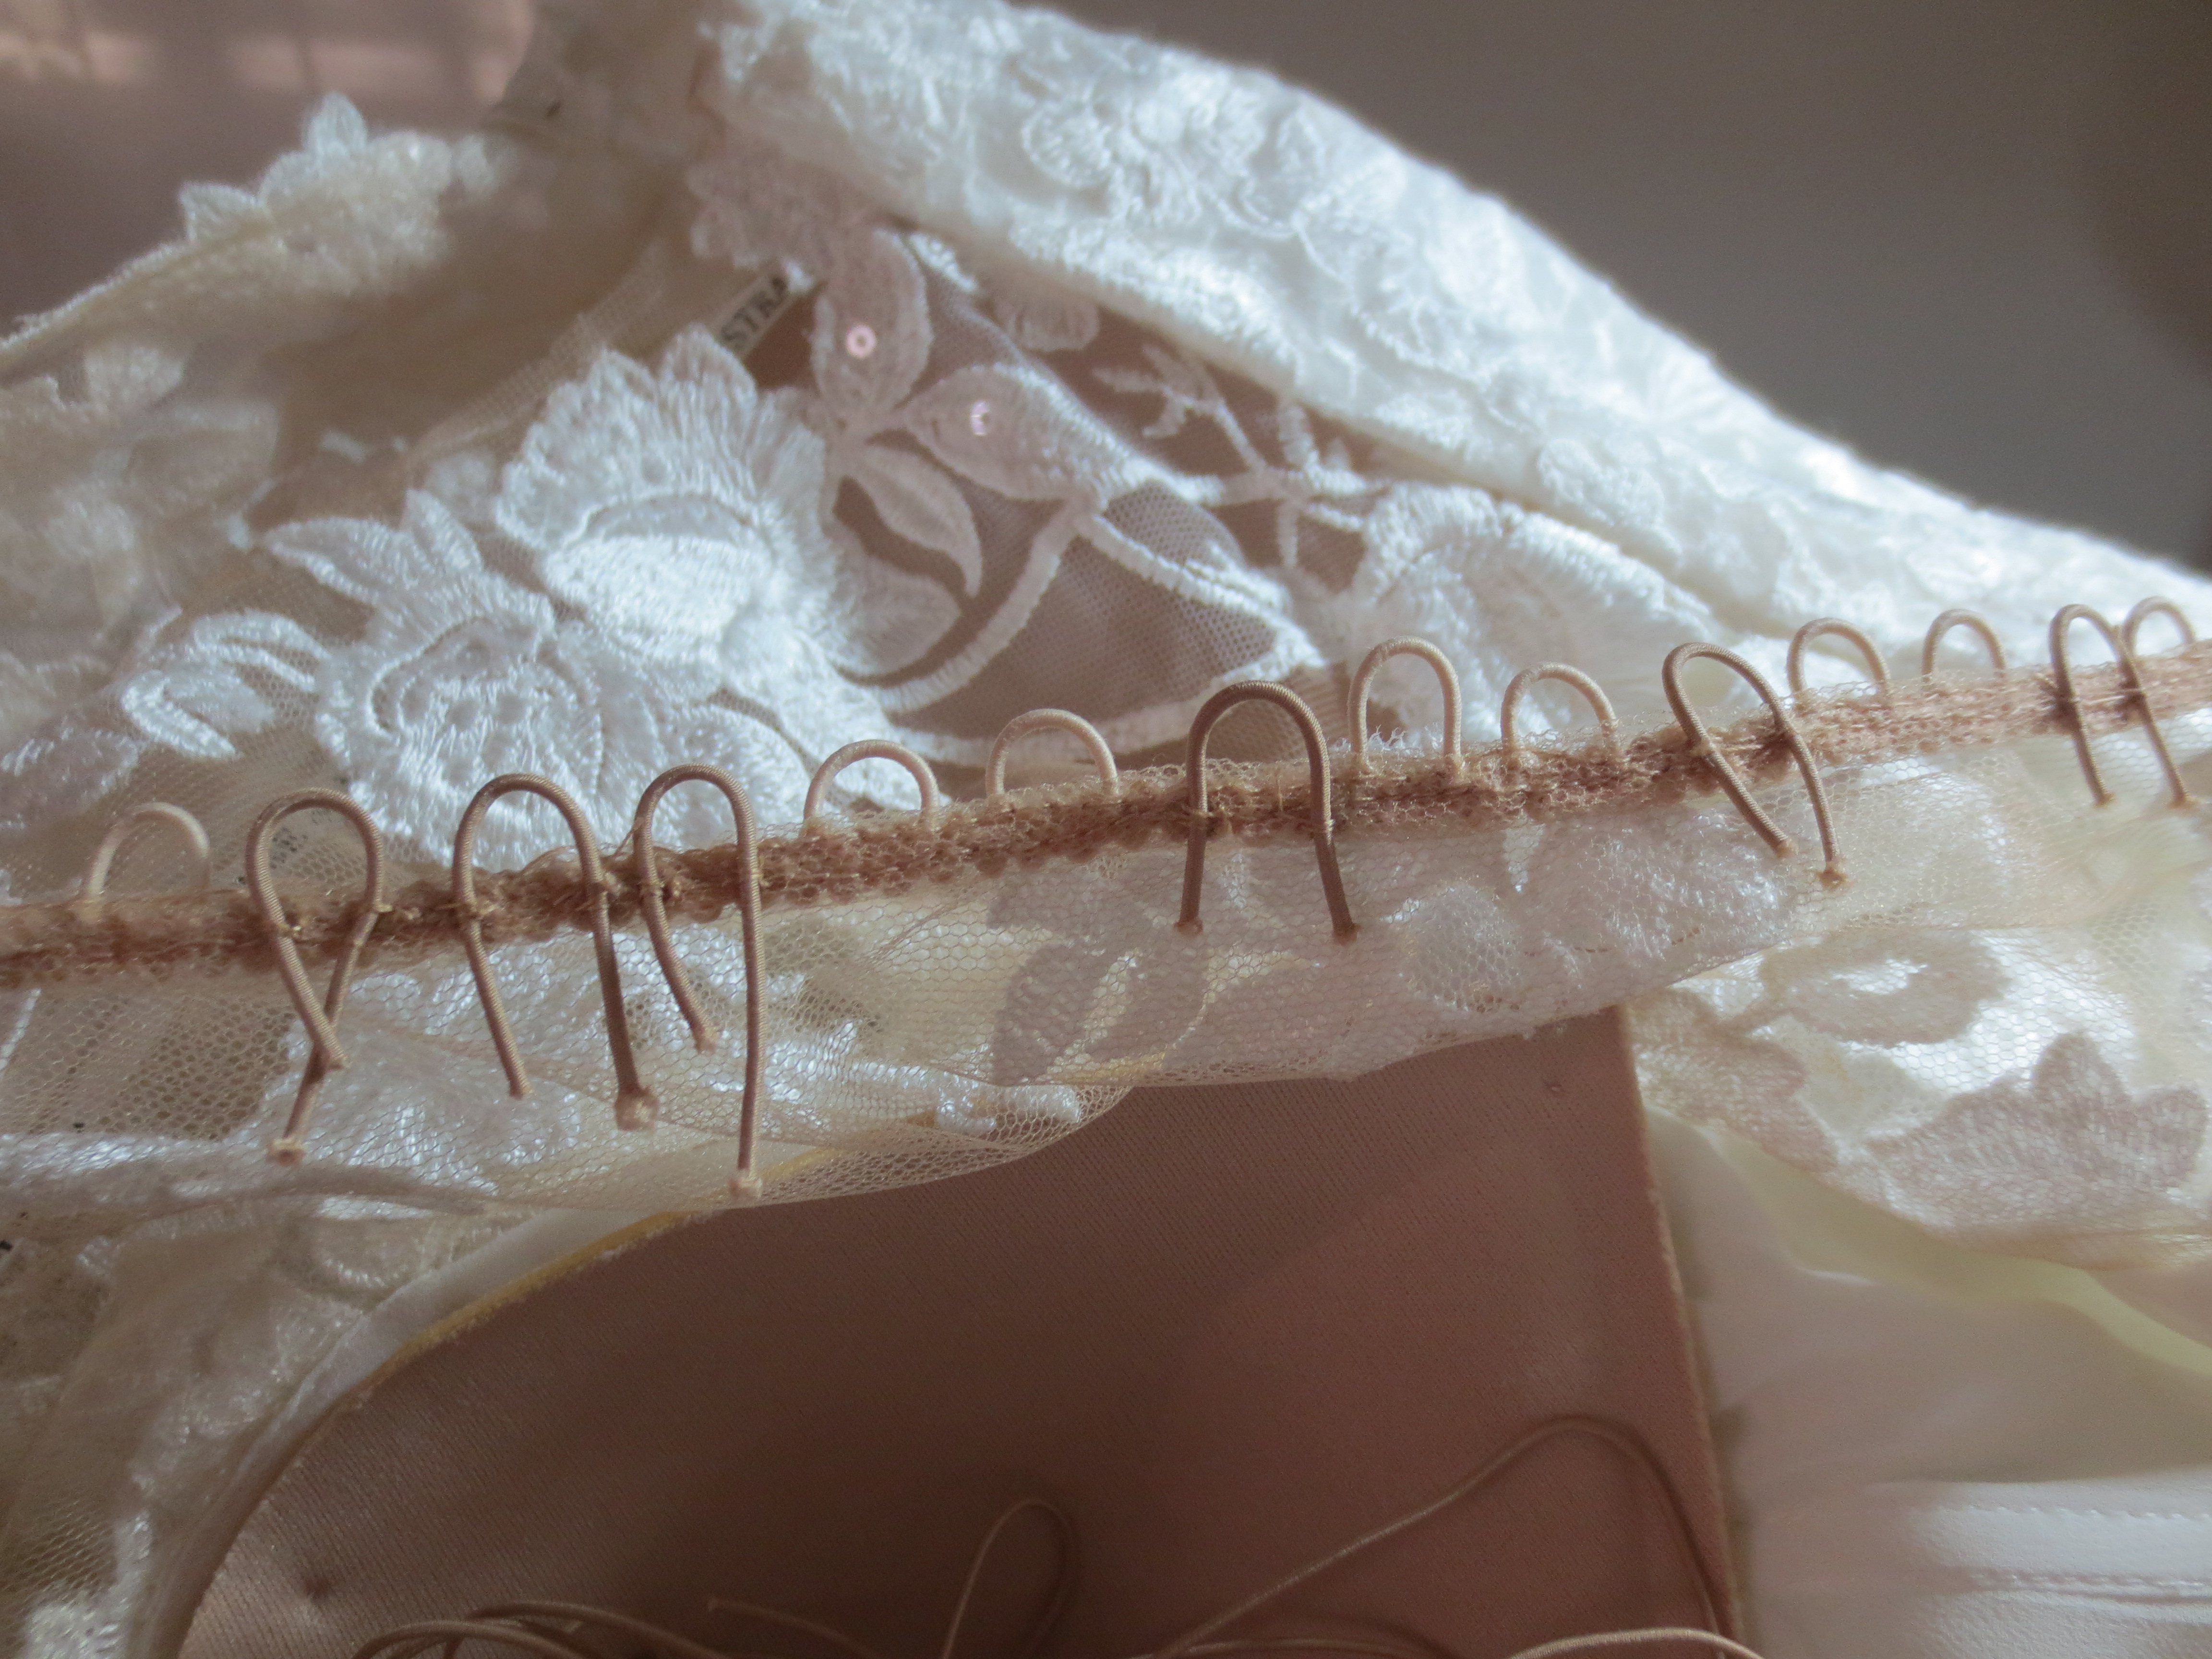
Here is the idea. I needed to create a loop that looks like all the others.

Now it's time to snip off the worn loops.

I hand stitched a new loop in the blank space. This is done to hold it place before machine stitching.
Here's a bunch of them hand sewed in place.

I machine stitched 3 times over each loop. Forward, back stitch and forward again. This will ensure the loops are secure. Before this process, I tested this cord which I stitched on similar material. The result was a positive one. I stretched it a few times away from the trim and it was a strong hold.

Stitched the last of the loops.

I carefully trimmed the excess cord underneath the stitching.

Voila! New loops!
The following are some of Ivona’s photos she sent me, so beautiful! In the next tutorial, part 2 series, they’ll
be more photos of this wedding to check out!


That completes part 1 of this tutorial series! The button loops are repaired and in my next post will be about hemming the lace applique gown. See you next time and thanks for stopping by!
😉💖🧵🧷✂


Post a Comment