I'm wrapping up all my posts for Homecoming and this is my last one for the season! This sparkly dress needed a few alterations: take in sides, add cups and I had to create a single bust dart on the left side.
The one side fit well, but the other did not. I realized it was not a matter of taking in the sides even more, it was clearly gaping at the bust even when I pinned her up at the sides. The only solution was to create a hidden dart on the one left side. It was helpful that the dress had lots of sequins, because that disguised the work.
Here is the before shot - I have the bust pinned on the left side.
Here's a close up on the dart pinned. This is exactly what we needed to close the gap.
Here is the dart I kept pinned.
The only way I could access this area was to open the lining from the inside. Sometimes you have to find an alternative way if the dress is all closed up at the bodice.
I marked with chalk the 3 points where the dart was folded up. I released the pin and connected the dots.
I removed the under stitching as you can see here. I took a pin and used the pin and chalk method of marking the fabric underneath. I need to duplicate the dart on the sequin fabric and lining.
Pinned the bottom of the dart.
I went through the opening I made, found my pin and marked with chalk.
Here's my marks on the other side of the sequin fabric.
I folded up the sequin fabric matching up the points.
I decided to baste the seam only to make sure it looked good on the other side.
So far so good!
I did the same and basted the dart on the lining.
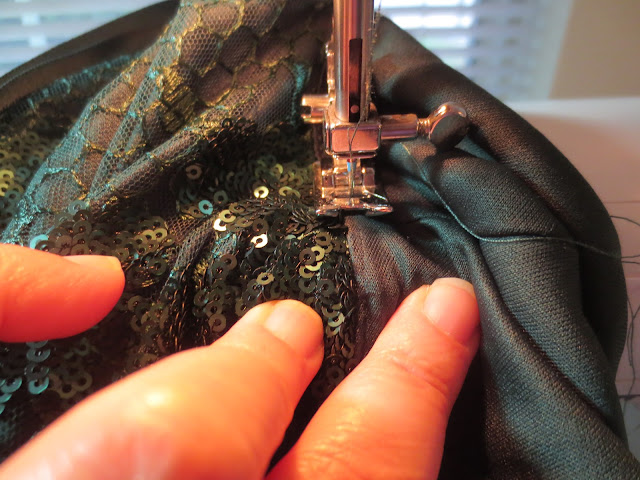
I machine stitched over the basting stitches on the sequin fabric.
Pulled out the basting stitches.
Looks good!
I machine stitched over the basting on the lining.
Instead of backstitching at the end of the darts, I tied the ends. I always read about this in my books.
You could cut the excess off of the dart, but I decided not to. I was thinking along the lines of any future alterations if someone else wore the dress.
Now it was time to re-stitch the under stitching. This always takes a little work because you have to reach from the inside and make sure the fabric and seams are completely flat and nothing is in your way underneath.
Now that I was done with all my alterations (take in sides, add cups and add bust dart) I could finally close up the opening of the lining I made. I just pinned the opening and stitched it shut.
I machine stitched as close as possible to the edge.
All closed up and the dress is complete!
I hope you enjoyed this tutorial! Thanks for stopping by and I'll see you next time!
😉💖🧵🧷


Post a Comment