
Here is Kaylee in her green sequin gown for prom. Just look at all those sequins! This is such
a sleek and fabulous gown.
This was a basic alteration of taking in the sides except a
few challenges – a zipper on the side and fixing wrinkles that formed as I was pinning
and taking in the gown. I took in equal
amounts on both sides and when I got to top of the dress, I could no longer pin
due to the zipper, workings and excess fabric.
I just pinched how much and wrote down the measurements. The rest of the pins going downward just
naturally fell into place. I includes a before pic below of Kaylee at a fashion show wearing this gown. It was just a little loose causing the gown to wiggle its way downward. We just needed to tighten up those sides a little to secure it.
In this lengthy post of 57 pictures, I’m going to show you
the alteration process of removing many stitches on several pieces and parts
and putting them back together. I also
had to remove the zipper, make the alteration on one side, and replace the zipper. This gown took a little time but turned out
fitting terrific on Kaylee.
I’ve learned so much working with sequin fabric. I think many people wonder how it handles when
you sew and how in the world do you press it with an iron?? It behaves just like any knit fabric and the needle
sews right through it. You should stitch at a slow to medium speed as the
needle passes through. As far as
pressing it, you just use a press cloth to protect the sequins from melting. When you cut sequin fabric, I would not use your
regular scissors for fabric, just use another pair because the sequins may chip
the blades. Also be prepared to clean up
a sequin mess and watch out for flying sequins in your eyes! These are just a few things I learned along
the way.


Here is a before shot of Kaylee at a fashion show. The gown had a loose fit, but could definitely be fixed by taking in the sides.
Here's the right side pinned up.
Left side pinned up. The left side is where the zipper is. I could not pin towards the top because I had so much material and zipper workings gathered in one spot. I just pinched the top area with my fingers and logged in the measurement.
As I pinned the sides, horizontal lines were forming at the waist. To fix this, I pinned excess sequin fabric and lining at the back top only. I pinned up until the lines disappeared.
Front right side pinned up.
Front left side pinned up.
Here's the back top of the gown with my safety pins marked.
I inserted additional pins where the first ones were. I then released my first set of pins.
There is another lining with boning underneath also.
These hanger loops will have to be removed and sewn back on.
I start removing stitches between the lining and the zipper with a razor blade.
Taking measurements from the zipper, this is how far it has to be moved.
Removing more stitches between the sequin fabric and the zipper.
Removing stitches from the foundation lining from the outer lining.
Removed top piping trim from the sequin fabric and lining.
Removed additional stitching which held together the sequin fabric and lining.
I do this every time when I do gown alterations, and I do get technical. I draw a quick diagram as reference. It's kind of like a work instruction for myself with visuals, distances and measurements.
Here's my diagram in action. This is one of the sides all pinned and marked up.
I like to use a regular pencil for light fabrics. I find it works exceptionally well.
Here is the back top which I have pinned and marked for stitching across.
The sequin fabric and lining need to stay together as one. I stitched together underneath where I'm about to cut.
Piece is cut.
Sewing one of the sides.
Here's the tricky part where the sequin fabric is not sewn to the lining. It's near the hip area. There's a part where it stops and I have to continue sewing separately on the sequin fabric and lining.
Here's some of the finished stitching.
Since I'm taking in a good amount on each side. I have to relocate some of the boning on the lining foundation.
Here's some boning removed.
Here's one of the hanger loops that had to be pinned back in place. Don't want to forget those!
Sewing the same alteration on the foundation lining.
Finding a new placement for the boning.
Stitch back in place.
Trimmed excess fabric.
Enclosed with fabric. This is for one of the sides. It was originally put together like this.
Finding a new placement for this piece of boning. This one is not enclosed. It just needed to be relocated a little.
Removed the stitching of the silicone tape. This helps keep the dress in place.
Removing more excess from the foundation lining.
Stitching back the piping to this top trim.
Stitched the top piping trim back on.
Stitched the silicone tape back on.
Here is the beginning of the alteration of the zipper side.
This is that hip area where it separates and I have to sew it separate.
Trimmed off excess starting at the top. Prepping for the zipper.
I hand basted the zipper on first.
Another close up.
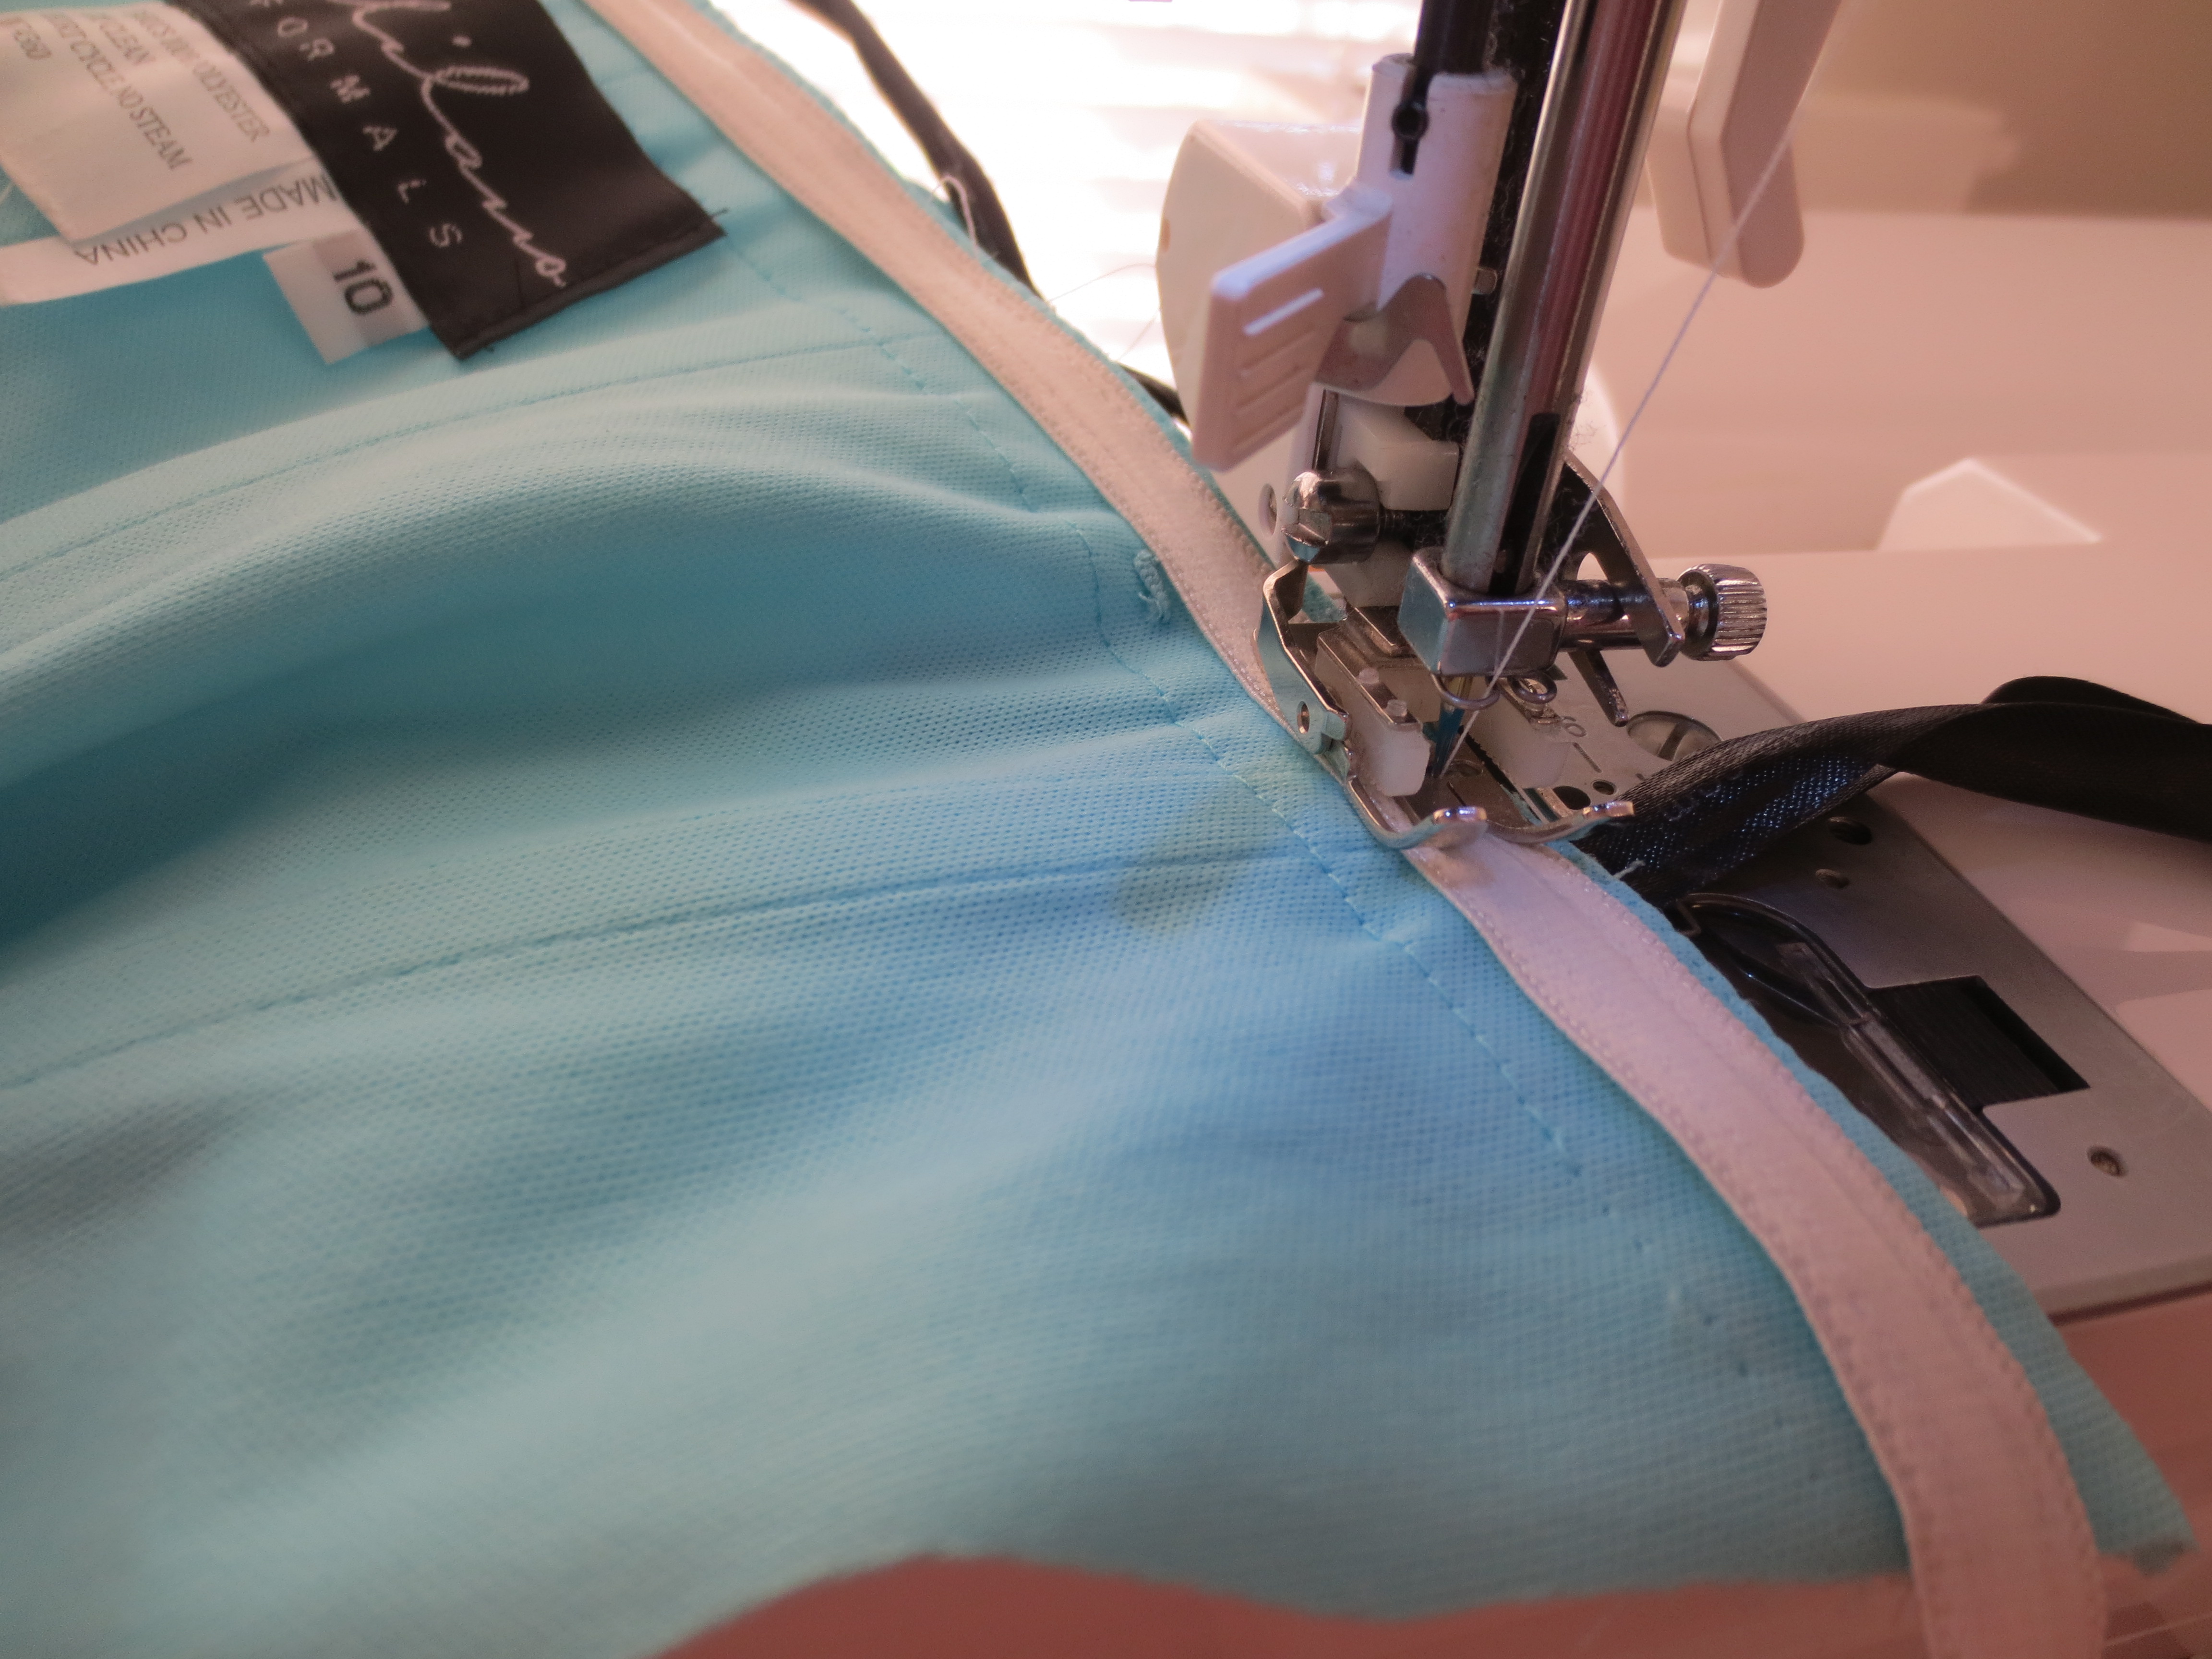
Using my zipper foot, I started stitching the zipper back on.
Had to sew some hand stitches to secure the top end of the zipper.
Now it's time to attach the foundation lining to the zipper.
Hand stitched the hook and eye back on.
Another close up of the hook and eye.
Finished! Here's Kaylee trying on her altered gown.
Front shot.
Back shot.
Another back shot.
I hope you enjoyed this post! I tried to make it informative and interesting so you can see the work that goes into alterations! 🧷🧵👗


Post a Comment