There are times when you order that swimsuit online and it’s not what you expected or doesn’t fit you in some areas. It may even be a huge hassle and expensive to return it. I had a client present some ideas of changing these swimsuits she bought. She wanted to use some of her old bra cups to sew into the new suits. The original cups on the suits were poorly made, they had no cup shape or dimension to them. I thought this was a great idea, plus I’ve seen articles on swimsuit hacks like these.
Her idea was to cut off the original bra cups from the suit, cut the old bra cups from the bra, cover the cups with material and sew back on the suit. In the end, it was a success and the suits looked way better with a more shapely bust.
Before - Swimsuit #1 and #2
After - Swimsuit #1
After - Swimsuit #2
Here is bathing suit #1. I started by cutting off the cups to the black bra.
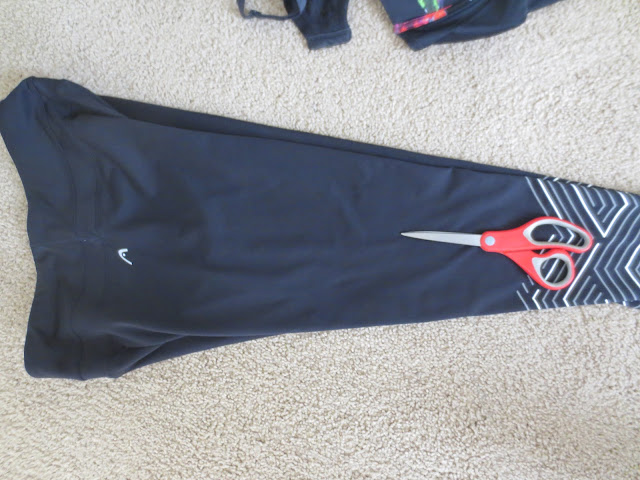
I needed to cover the bra cups with either bathing suit or active wear material. I feel both kinds are sufficient for swimwear. I got the donor material from these active wear pants. I had plenty to use for the covering the cups.
I covered one of the cups and pinned all around. I left plenty of material behind the cup. I didn't cut it yet.
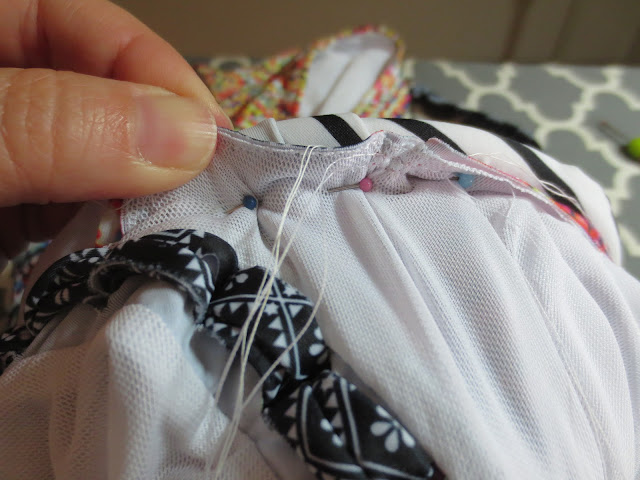
I took some contrasting white thread and basted. I did this because it's easier to run it through the machine without getting jabbed by those straight pins.
I stitched above the basting all the way around.
Removed white thread.
Now it was time to trim all the material near the stitching. For this project, a lining is not necessary, unless you like the look of one to cover all the raw edges.
In order for me to place the new cups back on, I had to add some material back to the middle section between the bust area. When I cut off the original cups from the suit, it left me with very little material in the middle to sew the new cups on. In the pic above, I cut off the material that was covering one of the original bathing suit cups. I used it to add more material to the mid section. Below, I drew a diagram to show you the next steps of what I did and why.
With this explained, I have more material for the cups to grab onto. The donor piece was the exact floral design as the front of the suit.
Here's another close up of the piece stitched on the front.
This is where the cups get stitched onto the body. The cups are placed right side down and upside down on the body and stitched. I stitch on the inside of the boning as shown here.
Next, I needed to make some loops to sew on the body for the hardware to hook on. I just cut two pieces for the bra and stitched in on the body where it was needed.
She didn't want the gold buckle on the back of the suit, it was coming undone and was not very secure. She wanted the hooks from the bra put on the suit. I cut the hooks and eye set off of the bra.
Here's the buckle I will cut off.
I slipped in my small scissors in and cut.
I stitched the hook piece right side down on the suit.
Stitched down another row of stitches for security. I did the same for the eye set from the bra.
Finished back. It's better to have adjustable hardware for comfort.
Now we're moving onto swimsuit #2. She gave me swimsuit material from a different suit to use for this one. I started to cover the cup, pin it around and baste.
Another angle...
I removed the pins, kept the basting in and machine stitched around the edges just like suit #1.
After machine stitching, I trimmed the excess fabric close to the stitching as shown.
All trimmed.
Here's the right side of the cup.
I had some extra suit material to use for the loops for the strap hardware.
Here's the strap with the hardware (below) I have to make a loop the same size as the hardware so it fits and is secure.
I folded a piece right sides together.
Stitched.
Trimmed excess.
I took my loop turner to turn the fabric right side out.
All turned.
I attached the piece to the top of the cup on the inside as shown.
It was time to cut off the original cups of the suit.
See the skinny piece in the middle? I have to attach more material to to that area in order to sew the new cups in. It's important I keep the entire curve shape so it does not look distorted.
I needed donor material, so I cut off material from the top of the swimsuit cups. I did this from both cups.
Here's the donor fabric.
I didn't want to to do the same method for the black swimsuit because of the color design. The donor material has all kinds of color and I wanted to keep it in the same color family. I took the pink section and placed in near the red color which is on the body piece.
I think it matches better than using the cooler colors.
I stitched the pieces on to a certain point as shown.
Here's the front. I feel the pink blends in well with the red.
I placed the cups on top where I'd like them sewn on. Now I got extra material so the suit still retains that shape, plus it would be impossible to sew the cups back on with very little fabric to work with.
What I'm doing here is sewing together the edge of the suit lining to the fabric. This will make it easier to attach those new cups because the layers are together as one.
I also had to gather the bottom together about 2 inches. The edge of the body exceeded the length of the cup. I had no choice but to gather it to make it equal.
Before attaching the cups, I also folded over the top piece to give it a nice clean finish on the outside.
Pinned on cups to body right side down and upside down.
Close up.
Now it was time to stitch it on.
Stitching is done for one cup. I flipped it over and this is what the inside looks like.
Here's the outside.
Here's a close up of the outside at the middle area. This is why I needed that donor material.
Another close up.
Both cups are now on and here's what the middle looks like.
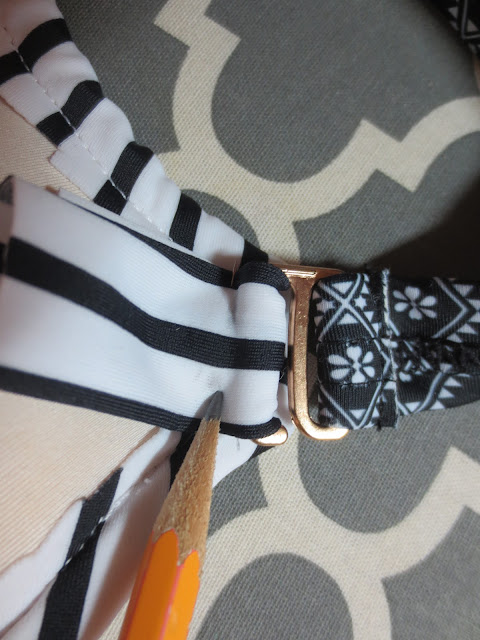
I needed to finish those loops for the strap hardware. I inserted the hardware and marked with a pencil where I needed to stitch.
Here's the stitching from the inside.
Here's the outside.
Trimmed off excess.
Last step was to hand stitch the inside at each edge just to keep in down flat.
We are now done with both suits! I hope you enjoyed this tutorial! Thanks for stopping by!
😄🩱🧵💖


Post a Comment